Table of Contents
Step-By-Step Instructions
This document provides step-by-step instructions for editing company information on the Taskistic platform.
Step 1: Access the Taskistic Platform
- Open your web browser.
- Visit the Taskistic platform by navigating to https://yourdomain.taskistic.com

Step 2: Navigate to the Company Section
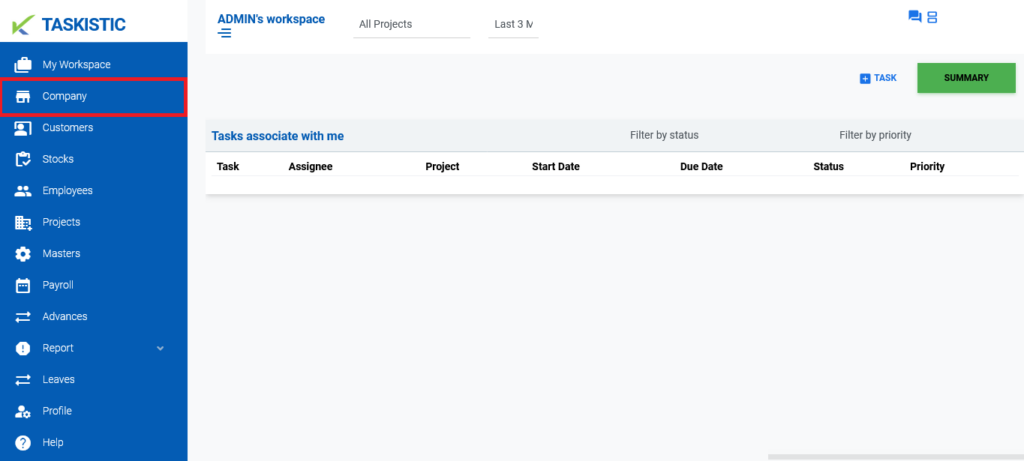
- Once you have logged in, look at the left sidebar of the Taskistic dashboard.
- Click on the “Company” tab to access the company management section.
Step 3: Edit Company Information
The company dashboard consists of four sub-sections: Company Details, Company Settings, Additional Details, and Branches.
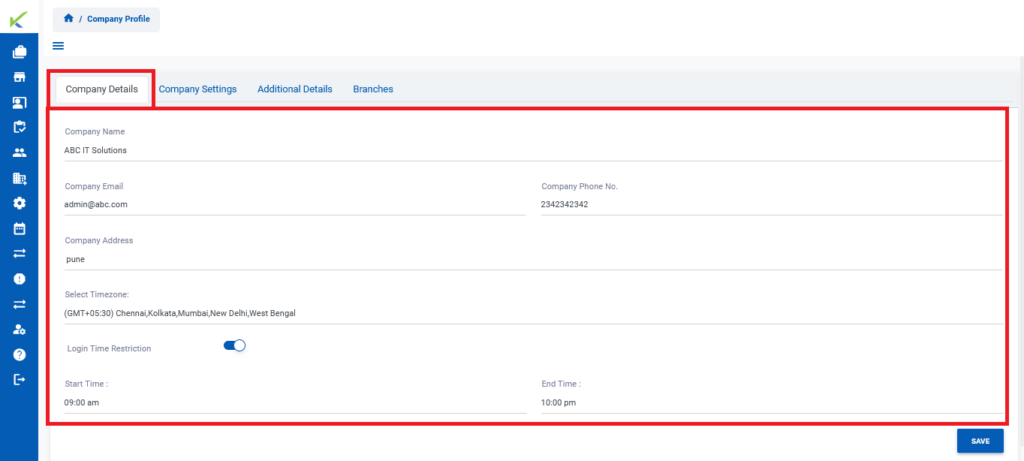
Sub Step 1: Edit Company Details
- Edit the company name.
- Edit the company email.
- Edit the company phone number.
- Edit the company address.
- Select the timezone.
- Edit the login time restriction. ON/OFF
- Edit the start and end time.
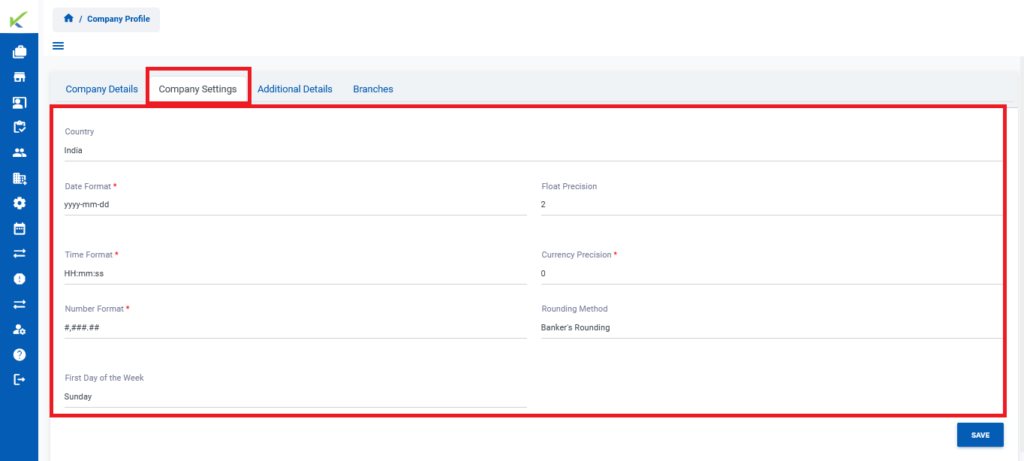
Sub Step 2: Edit Company Settings
- Edit the country.
- Select the date format.
- Select the float precision.
- Select the time format.
- Select the currency precision.
- Select the number format.
- Select the rounding method.
- Select the first day of the week.
- Select the rounding method.
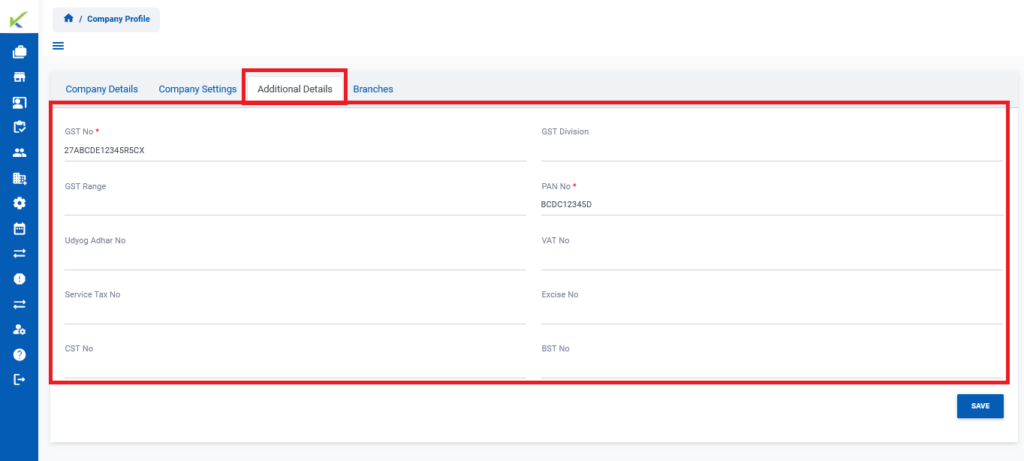
Sub Step 3: Edit Additional Details
- Insert GST No.
- Insert GST Division.
- Insert GST Range.
- Insert PAN No.
- Insert Udyog Aadhar No.
- Insert VAT No.
- Insert Service Tax No.
- Insert Excise No.
- Insert CST No.
- Insert BST No.
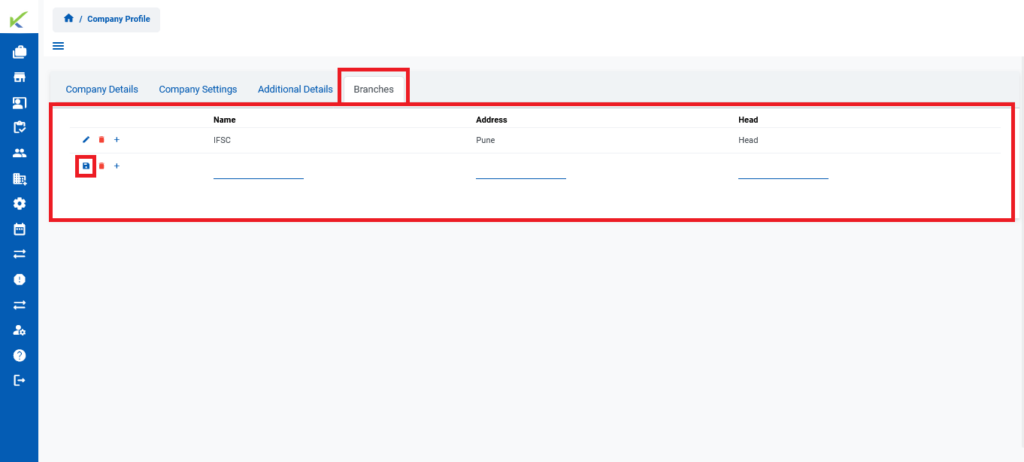
Sub Step 4: Edit, Delete & Add New Branches
- Once you click on the “Branches” tab, you will see three icons: edit, delete, and add new branches.
- Edit Branches: Click on the “Pen Icon” tab to edit branches.
- Delete Branches: Click on the “Red Bin Box Icon” tab to delete branches.
- Add New Branches: Click on the “Addition Icon” tab to add new branches.
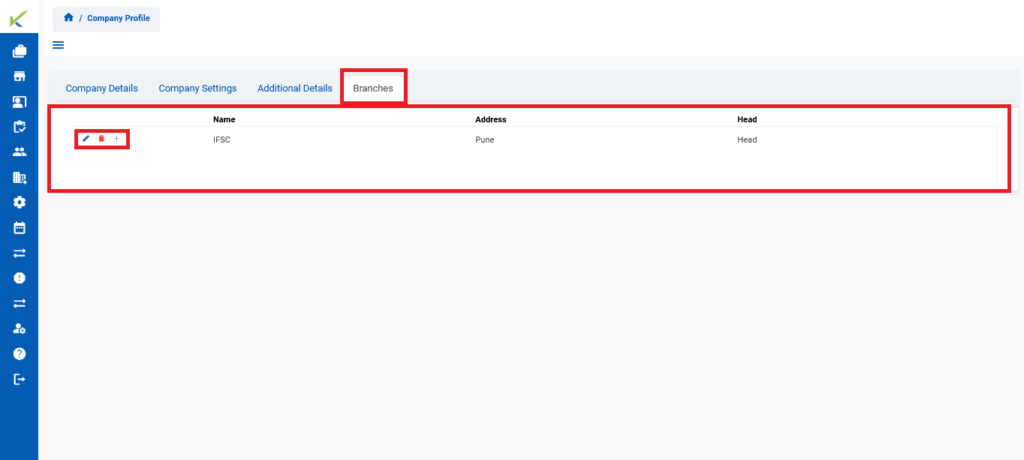
- After you edit information in branches, the pen icon is replaced by a save button, allowing you to save the branch information.