Step-By-Step Instructions
This document provides step-by-step instructions for creating a task on the Taskistic platform.
Step 1: Access the Taskistic Platform
- Open your web browser.
- Visit the Taskistic platform by navigating to https://yourdomain.taskistic.com

Step 2: Navigate to the My Workspace Section
- Once you have logged in, look at the left sidebar of the Taskistic dashboard.
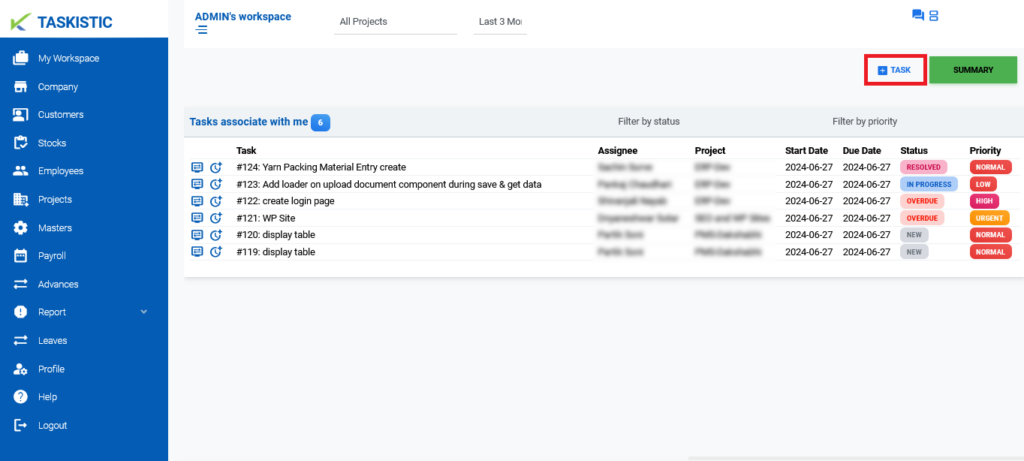
- Click on the “My Workspace” tab to access your workspace.
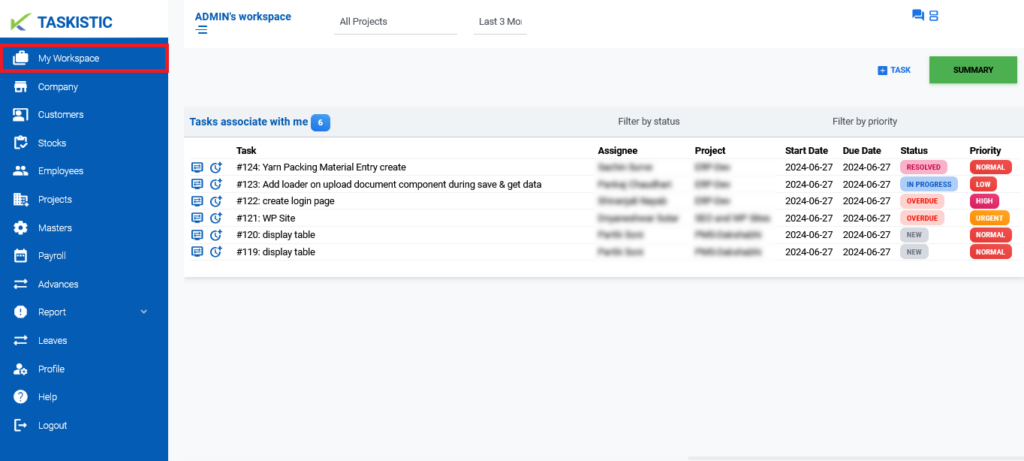
- In the “My Workspace” dashboard, find the option to create a task.
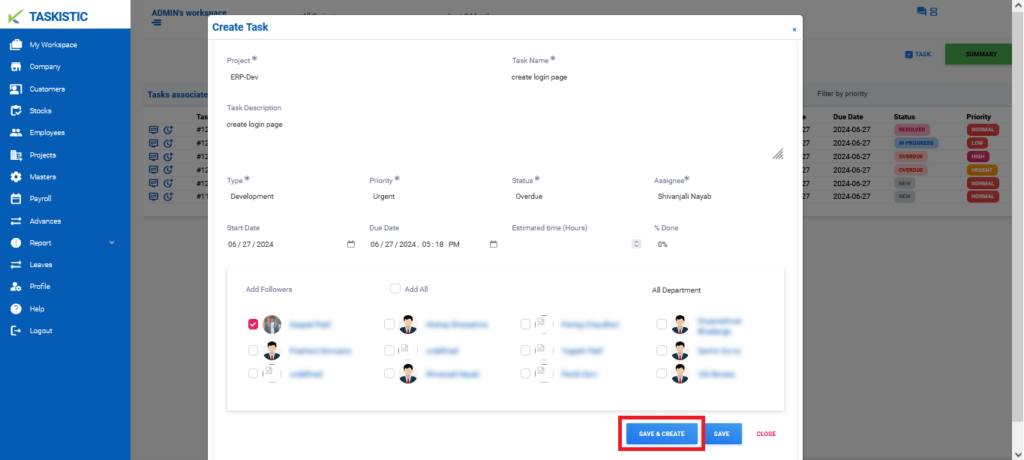
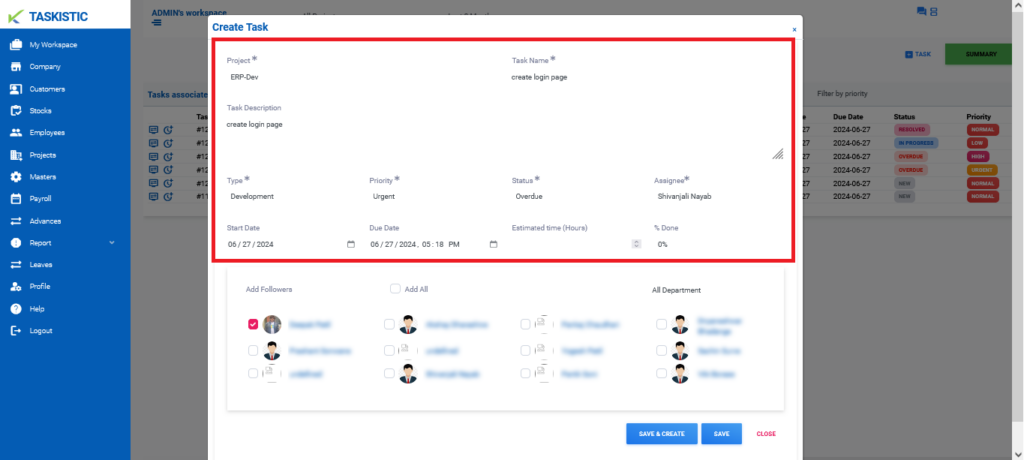
Step 3: Fill in Task Details
- Select Project: Choose the project to which the task belongs.
- Insert Task Name: Enter the name of the task.
- Insert Task Description: Provide a detailed description of the task.
- Select Type: Choose the type of task (e.g., Development, Re-Work, Testing).
- Select Priority: Choose the priority level of the task (e.g., Normal, Low, High, Urgent).
- Select Status: Set the current status of the task (e.g., New, Closed, Resolved, Re-Open).
- Select Assignee: Assign the task to the appropriate team member.
- Select Start Date: Choose the start date for the task.
- Select Due Date: Choose the due date for the task.
- Insert Estimated Time (Hours): Estimate the number of hours required to complete the task.
- Select % Done: Indicate the percentage of the task that has been completed.
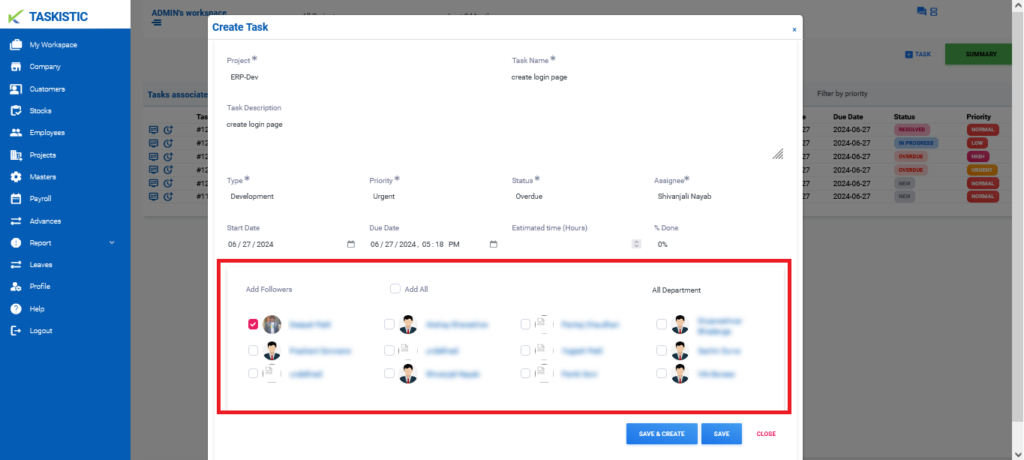
Step 4: Add Followers
- In the follower section, you can select or filter users by department (e.g., Development, HR, Management) to add them as followers who can monitor the task.
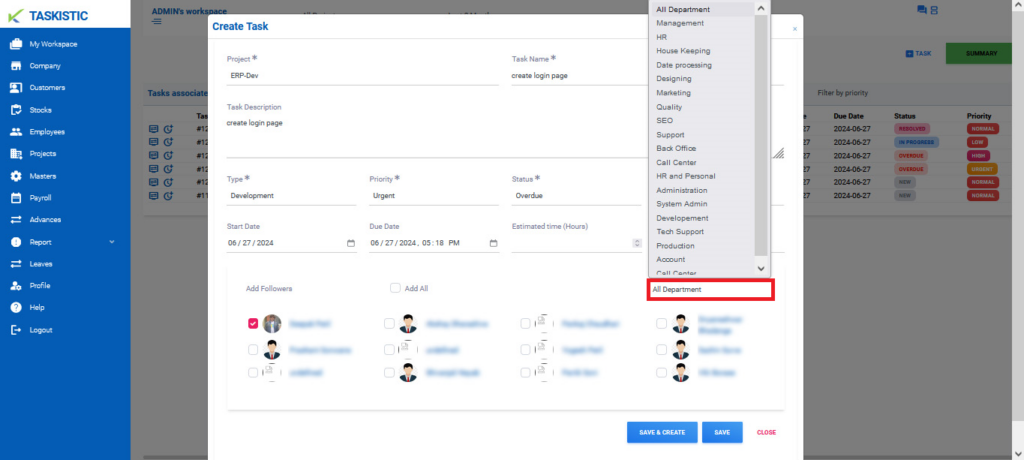
- You can also select all users or specific users by their respective profiles to add as followers.
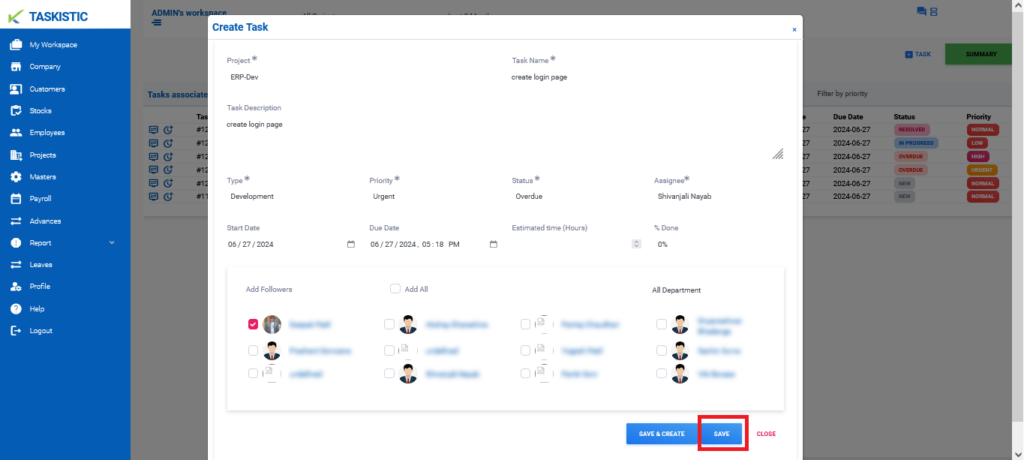
Step 5: Save the Task
- Save: If you just want to save the task without creating it, click on the “Save” button.
- Save & Create: If you want to save and create the task immediately, click on the “Save & Create” button.