Step-By-Step Instructions
This document provides step-by-step instructions for changing the customer view on the Taskistic platform.
Step 1: Visit the Taskistic Platform
- Open your web browser.
- Visit the Taskistic platform by navigating to https://yourdomain.taskistic.com
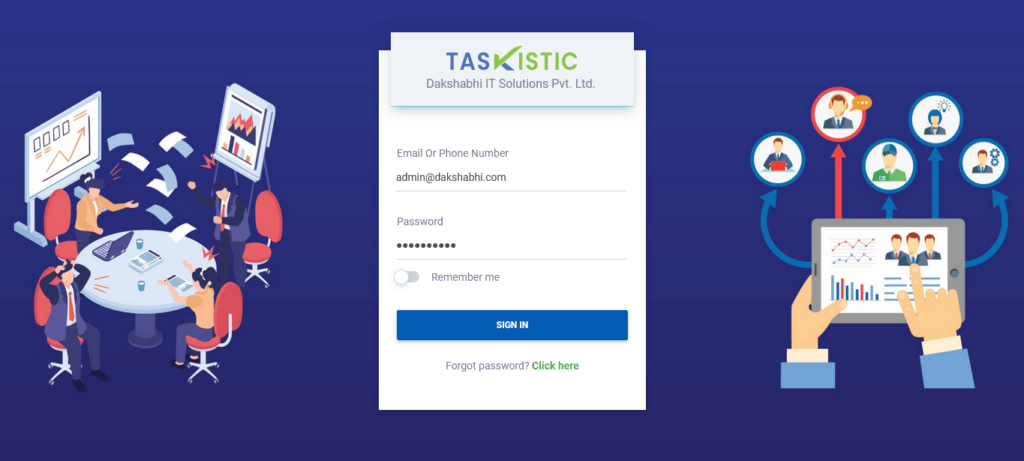
Step 2: Navigate to the Payroll Section
- Once you have logged in, look at the left sidebar of the Taskistic dashboard.
- In the left sidebar, click on the “Payroll” tab.
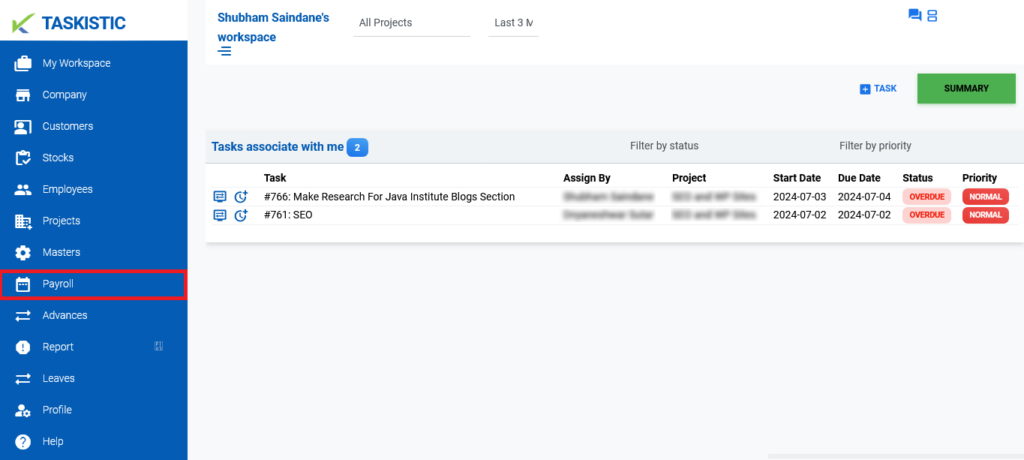
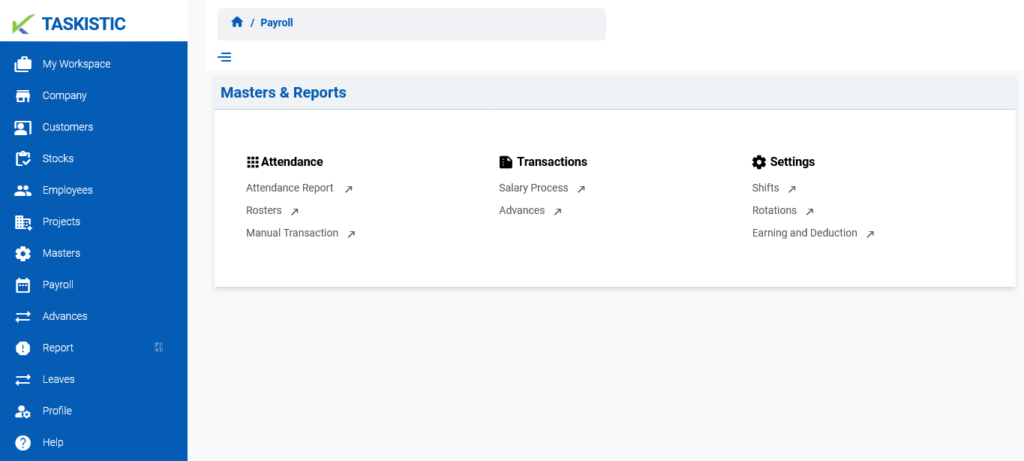
3. The “Payroll Dashboard” will appear.
Step 3: Access the Rosters Dashboard
- In the “Payroll Dashboard,” click on “Rosters.”
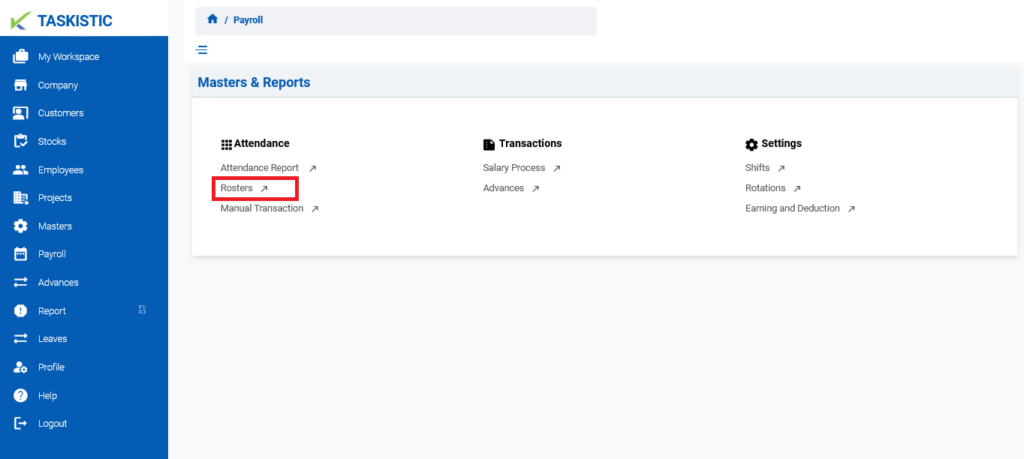
2. The “Rosters Dashboard” will appear.
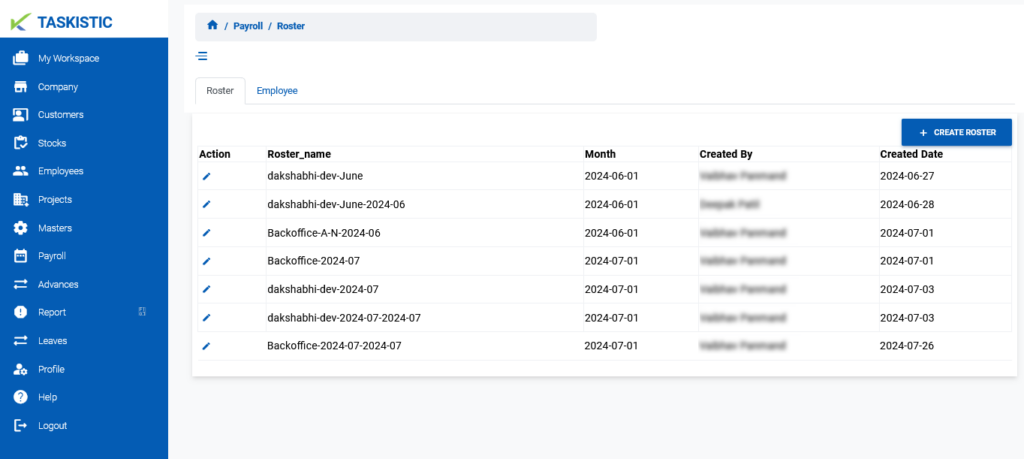
Step 4: Create a New Roster
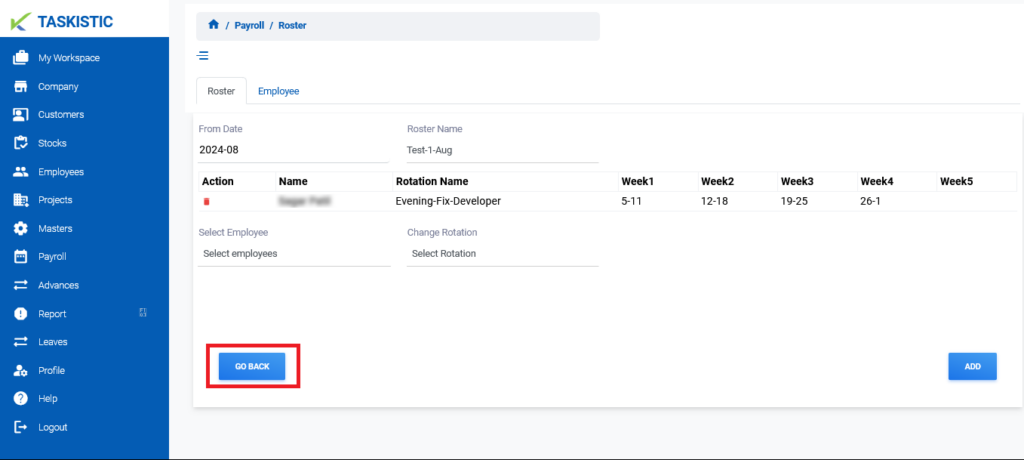
- In the “Rosters Dashboard,” click on the “Create Rosters” button.
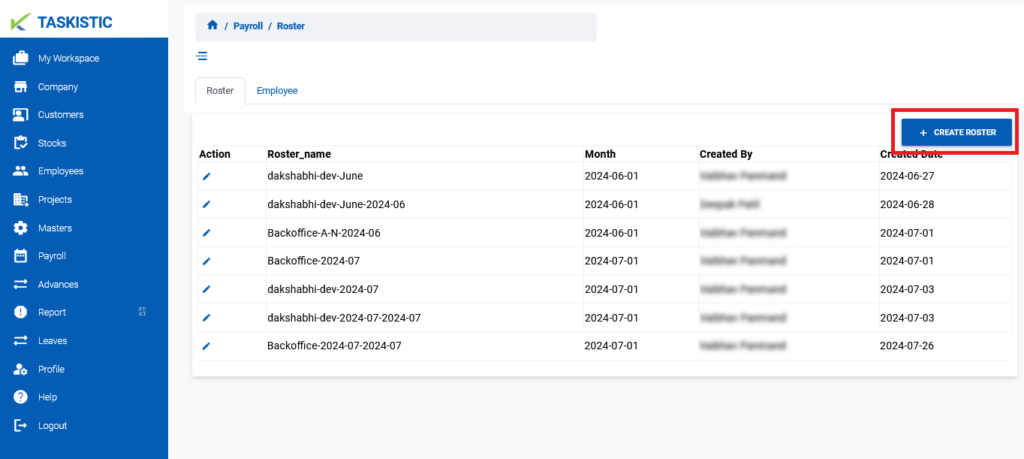
2. A form will appear.
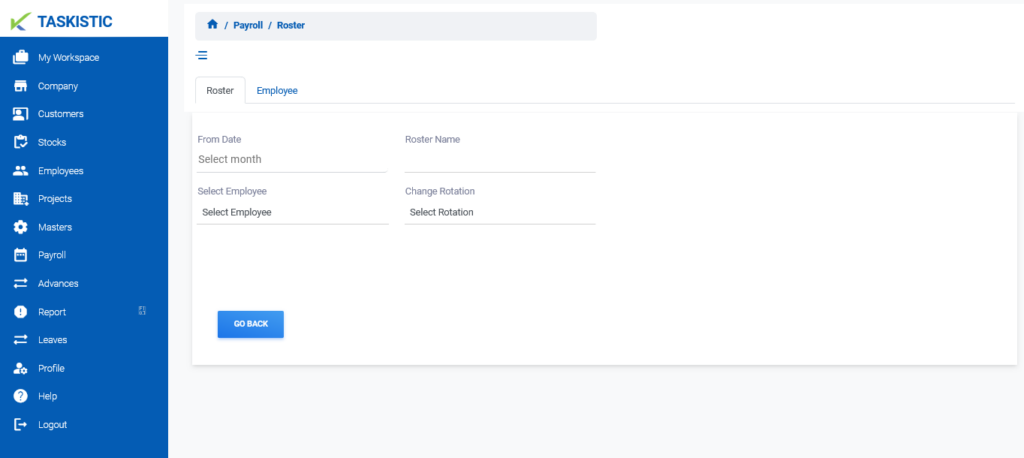
Step 5: Fill in Roster Details
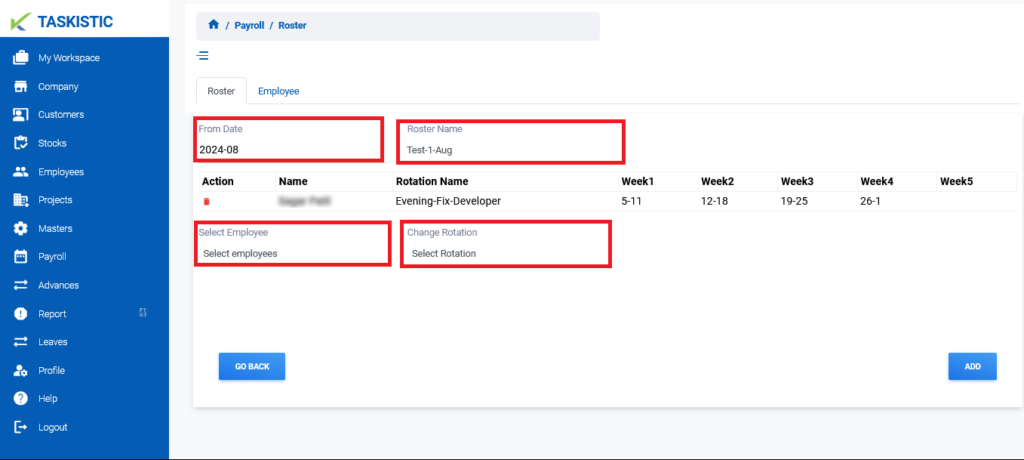
- Enter the following details in the form:
- From Date
- Roster Name
- Select Employee
- Change Rotation
Step 6: Save the Roster
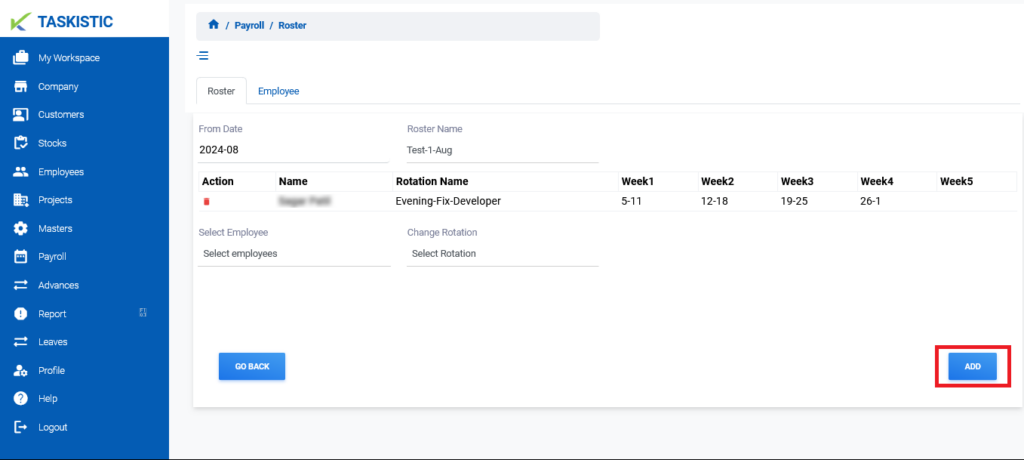
- After filling in all required fields, click the “Add” button.
- The roster will be created successfully.
Step 6: Return to Rosters Dashboard
- Click the “Go Back” button to return to the “Rosters Dashboard.”
