This document provides step-by-step instructions for creating a new project using the Taskistic platform.
Step 1: Access the Taskistic Platform
- Open your web browser.
- Visit the Taskistic platform by navigating to https://yourdomain.taskistic.com

Step 2: Navigate to the Projects Section
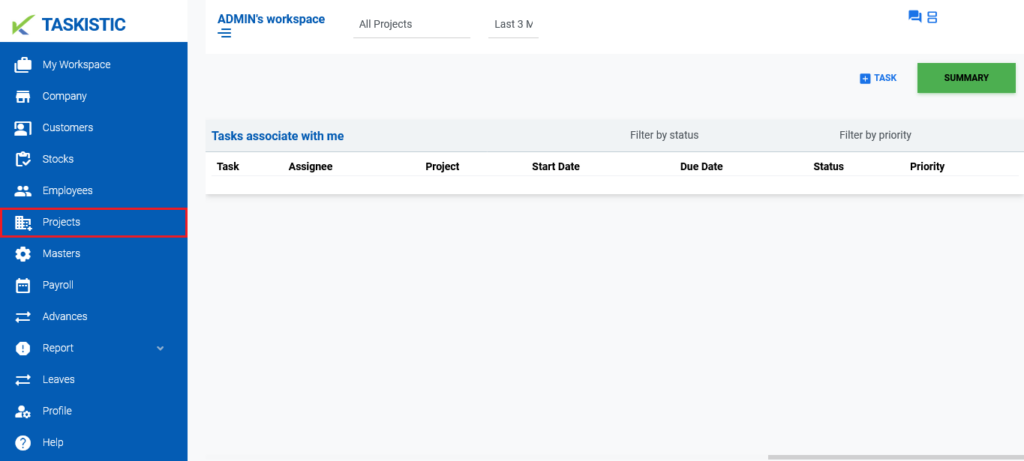
- Once you have logged in, look at the left sidebar of the Taskistic dashboard.
Click on the “Project” tab to access the project management section.
Step 3: Initiate a New Project Entry
- In the upper right corner of the “Projects” section, locate and click on the “Create New” button.
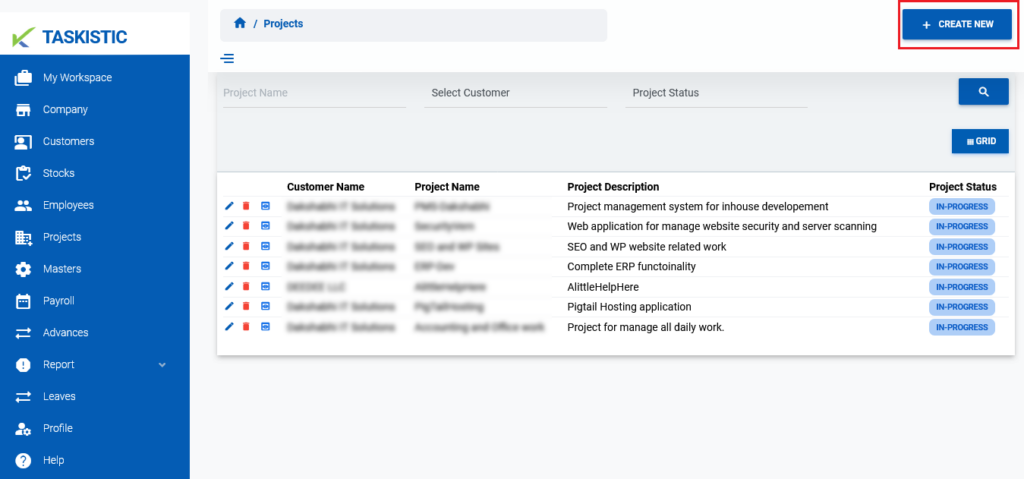
- When you click on the “Create New” tab, a new tab will pop up to create a new project.
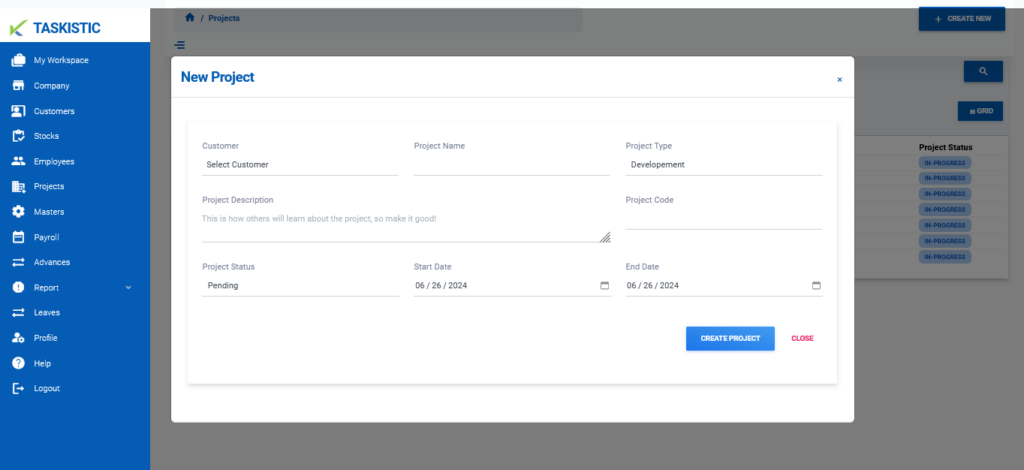
Step 4: Fill in the Project Details
- Select Customer: Choose the customer for whom the project is being created.
- Insert Project Name: Enter the name of the project.
- Select Project Type: Choose the type of project (e.g., Development, Marketing, Testing).
- Write Project Description: Provide a detailed description of the project.
- Insert Project Code: Enter a unique code for the project.
- Select Project Status: Choose the current status of the project (e.g., Pending, In-Progress, Completed).
- Select Project Start Date & End Date: Pick the start and end dates for the project.
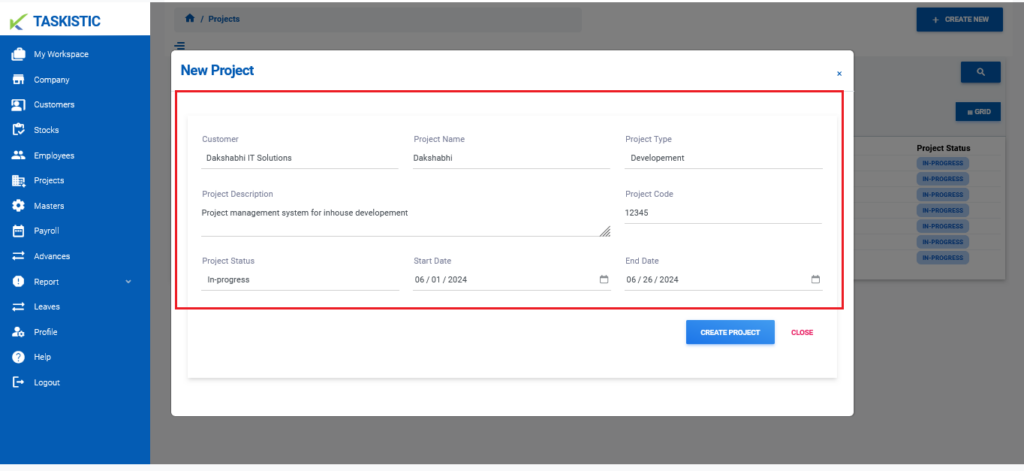
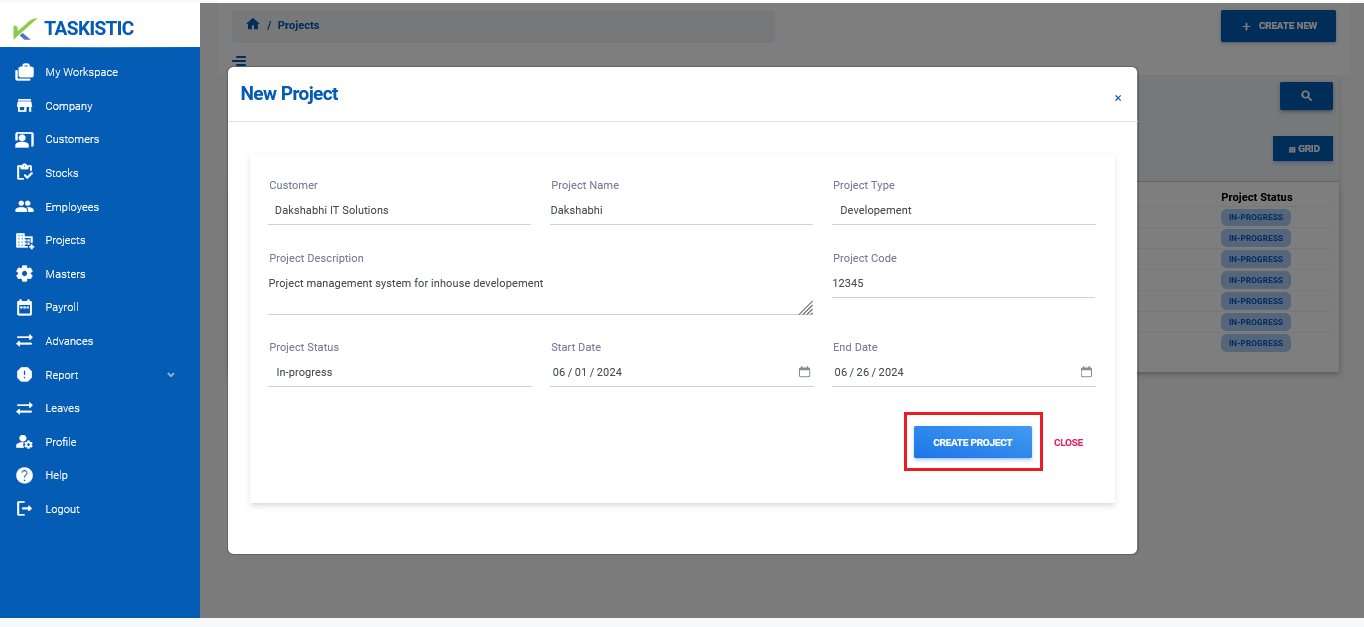
Step 5: Create the Project
Once all the necessary fields are filled out, click on the “Create Project” button to submit and create the new project.