This document provides step-by-step instructions for checking a user’s specific task view, task add time, task status, and priority on the Taskistic platform.
Step 1: Access the Taskistic Platform
- Open your web browser.
- Visit the Taskistic platform by navigating to https://yourdomain.taskistic.com

Step 2: Navigate to the My Workspace Section
- Once you have logged in, look at the left sidebar of the Taskistic dashboard.
- Click on the “My Workspace” tab to access your workspace.
- The “My Workspace” dashboard will be displayed.
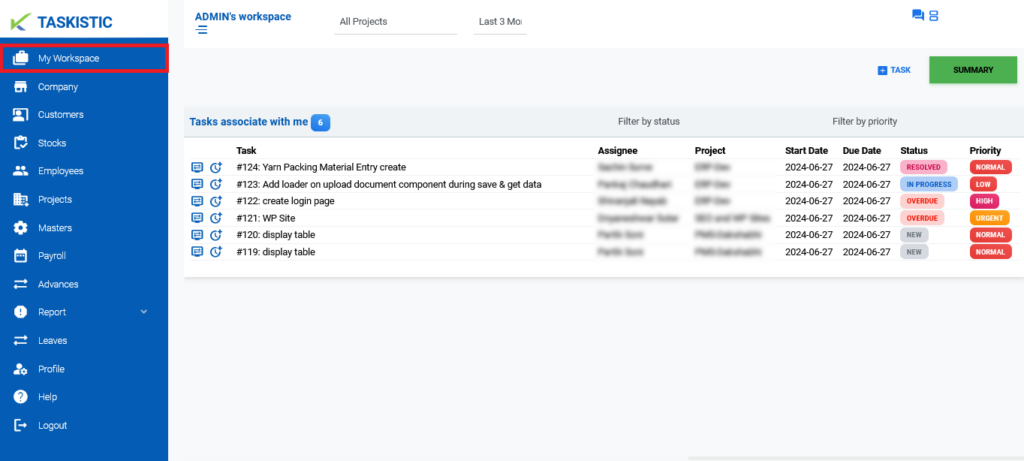
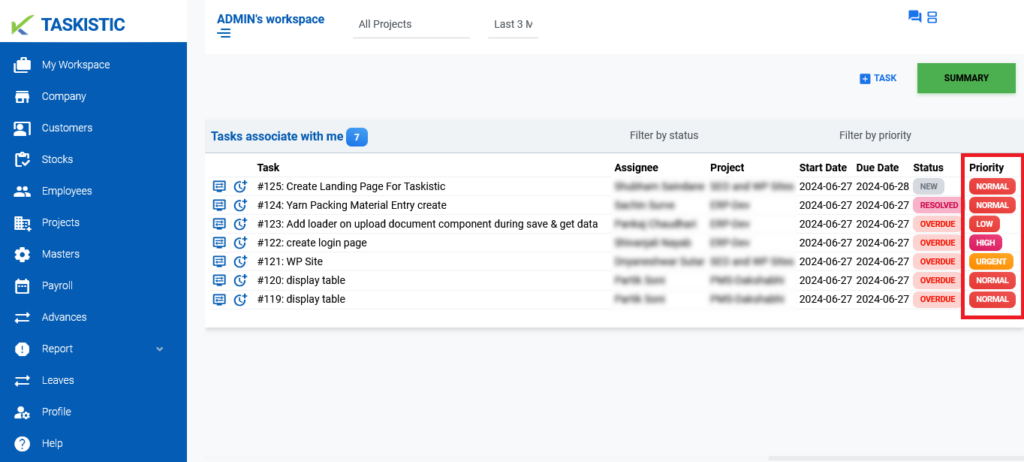
Step 3: View Tasks Associated with You
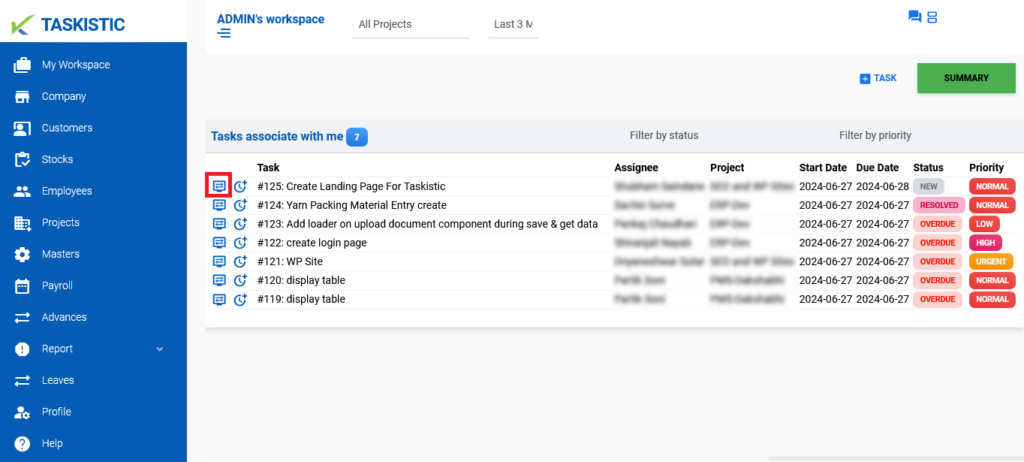
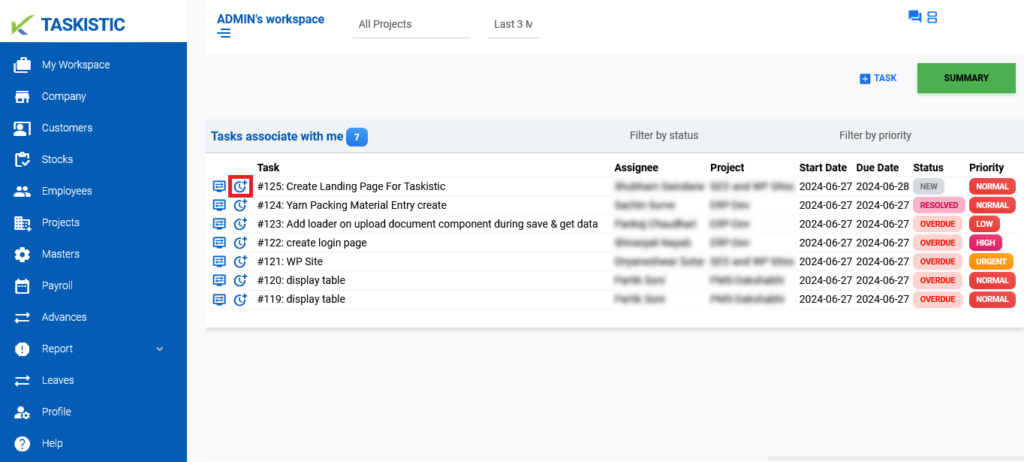
- In the “Tasks associate with me” section, you will see the task details.
- The first column contains a “Monitor” icon representing the task view. Click on this icon to view the detailed task information.
- The second column contains a “Watch” icon representing the task adds time. Click on this icon to update the task hours.
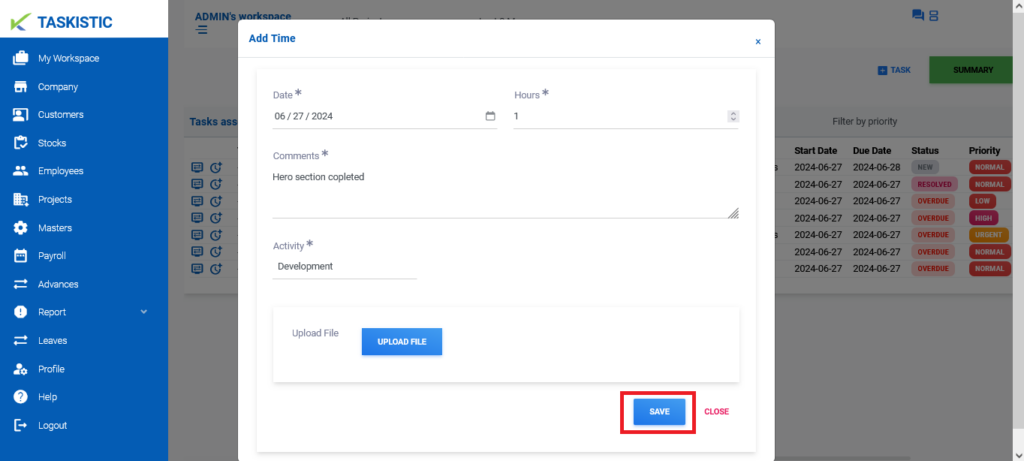
Step 4: Add Task Time
- Once you click on the “Watch” icon, an “Add Time” window will pop up.
- Fill in the details for adding task time:
- Select the date.
- Insert the hours.
- Write task comments.
- Select the activity, such as development, design, or testing.
- (Optional) Upload a file.
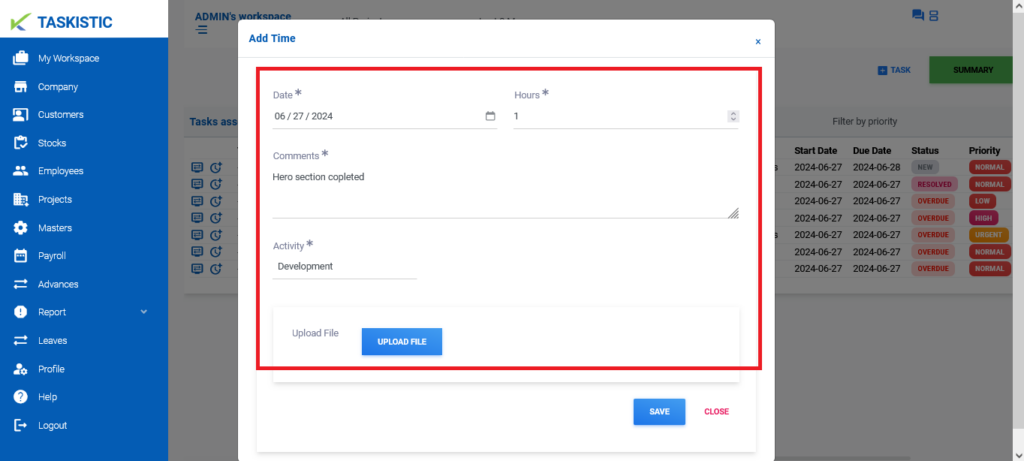
- Click on the “Save” tab to update successfully.
Step 5: Check Task Status and Priority
- In the sixth column, you can see the status of the task, such as New, In-Progress, Overdue.

- In the seventh or last column, you can see the priority of the task, such as Normal, High, and Urgent.
By following these steps, you can easily check and manage specific task views, add task time, and monitor the status and priority of tasks on the Taskistic platform.