- Step-By-Step Instructions
- Step 1: Access the Taskistic Platform
- Step 2: Navigate to the Employee Section
- Step 3: Initiate a New Employee Entry
- Step 4: Complete the Three-Step Process to Add a New Employee
- Sub-Step 1: Basic Information
- Sub-Step 2: Bank Details
- Sub-Step 3: Salary Information
- Section 2: Salary Information
- Section 2: Earnings
- Section 3: Deductions
- Section 4: Payroll
- Submit the Add Employee
Step-By-Step Instructions
This document provides a detailed guide for adding a new employee using the Taskistic platform.
Step 1: Access the Taskistic Platform
- Open your web browser.
- Visit the Taskistic platform by navigating to https://yourdomain.taskistic.com

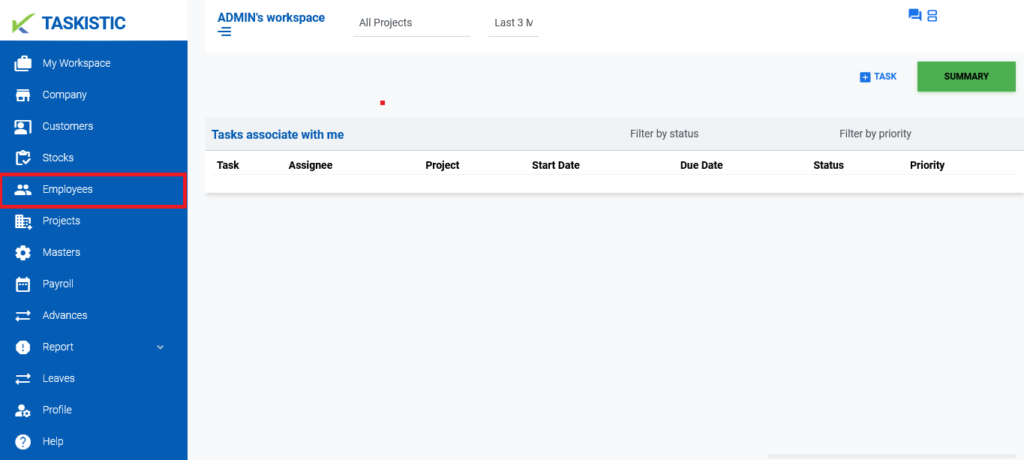
Step 2: Navigate to the Employee Section
- Once you have logged in, look at the left sidebar of the Taskistic dashboard.
Click on the “Employee” tab to access the employee management section.
Step 3: Initiate a New Employee Entry
- In the upper right corner of the “Employee” section, locate and click on the “Create New” button.
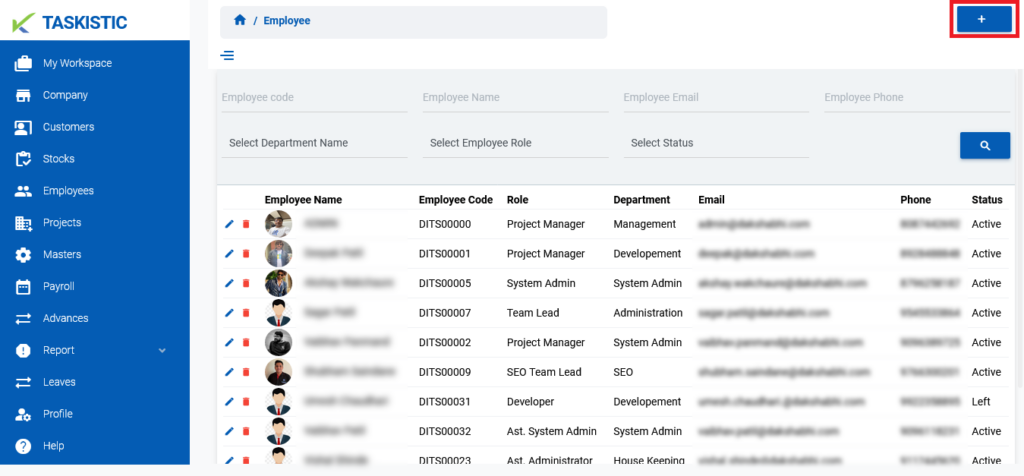
2. When you click on the “Create New” tab, a new tab will pop up to create a new employee.
Step 4: Complete the Three-Step Process to Add a New Employee
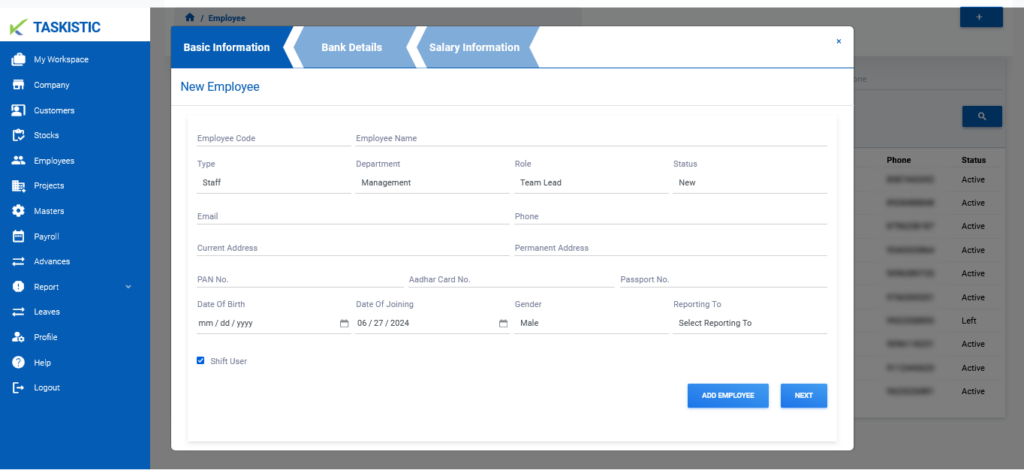
The new employee form has three sub-steps:
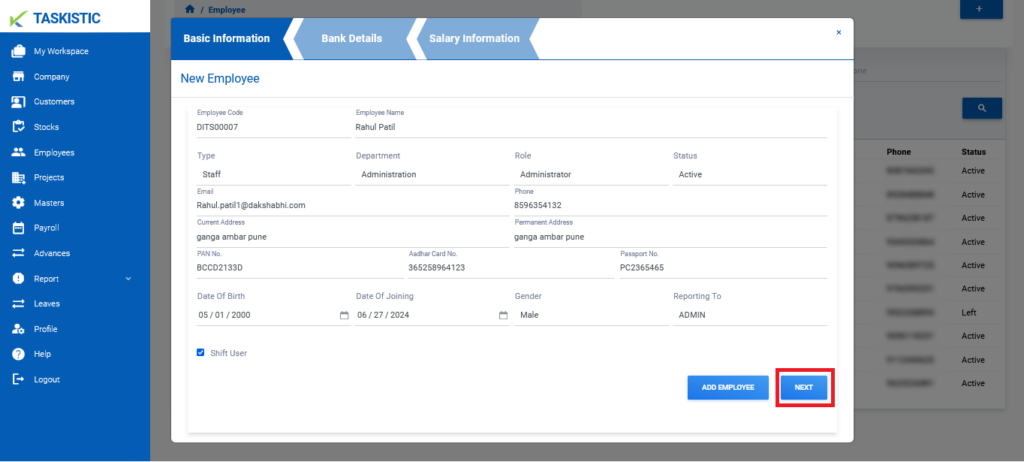
Sub-Step 1: Basic Information
- Insert New Employee ID
- Insert Employee Name
- Select Type of Employee (e.g., Staff, Trainee, and Consultant)
- Select Department of Employee (e.g., Management, HR, Development, Marketing, SEO, Support)
- Select Role of Employee (e.g., Project Manager, Team Lead, Developer, and System Admin)
- Select Status of Employee (e.g., Active, Hold, New, Terminated, Left)
- Insert Employee Email
- Insert Employee Phone Number
- Insert Employee Current Address
- Insert Employee Permanent Address
- Insert Employee PAN Number
- Insert Employee Aadhar Card Number
- Insert Employee Passport Number
- Insert Employee Date of Birth
- Select Employee Date of Joining
- Select Employee Gender (e.g., Male, Female, Other)
- Select Employee Reporting To (Select the name of the employee whom they will be reporting to on the joining day)
- Select Employee Shift (e.g., Morning, Noon, Night, Bo-Night)
Once all fields are filled out, click on the “Next” button located at the lower right side of the pop-up tab
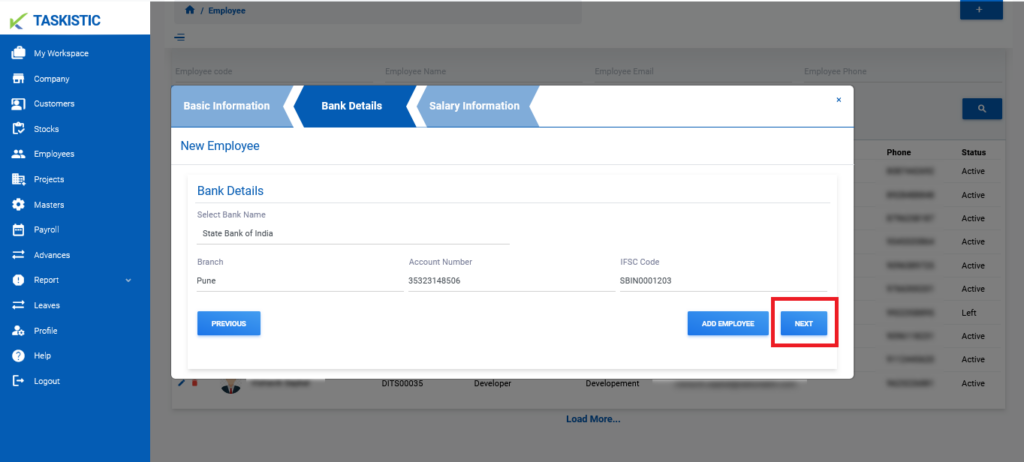
Sub-Step 2: Bank Details
- Insert Employee Bank Name
- Insert Employee Branch
- Insert Employee Account Number
- Insert Employee IFSC Code
Click on the “Next” button to proceed.
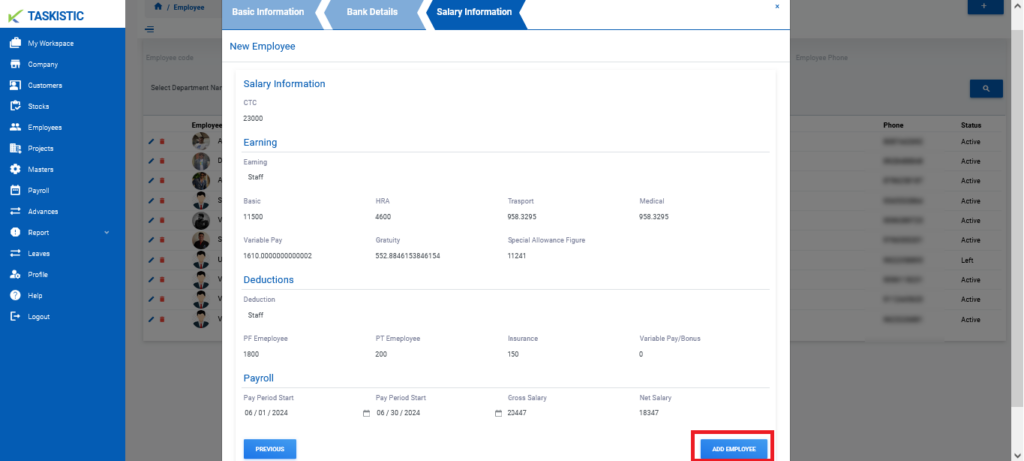
Sub-Step 3: Salary Information
The “Salary Information” section is divided into four sections:
Section 2: Salary Information
- Insert Employee CTC

Section 2: Earnings
- Select the respective department of your salary structure to calculate and display the earnings.

Section 3: Deductions
- Select the respective department of your salary structure to calculate and display the deductions.

Section 4: Payroll
- Select Employee Pay Period Start
- Select Employee Pay Period End
- Insert Employee Gross Salary
- Insert Employee Net Salary
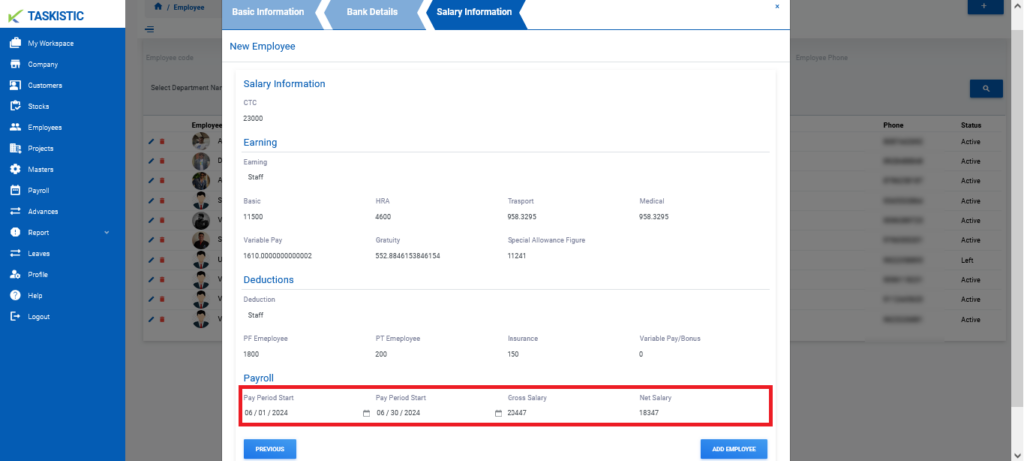
After filling in all the necessary details, review the information and submit the form to add the new employee.
Submit the Add Employee
Once all the necessary fields are filled out, click on the “Add Employee” button at the bottom of the form to submit your employee form.