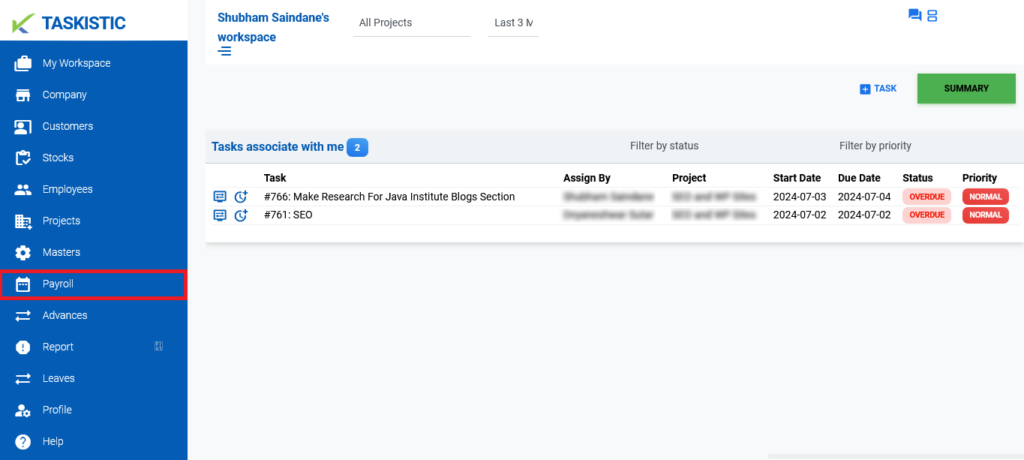
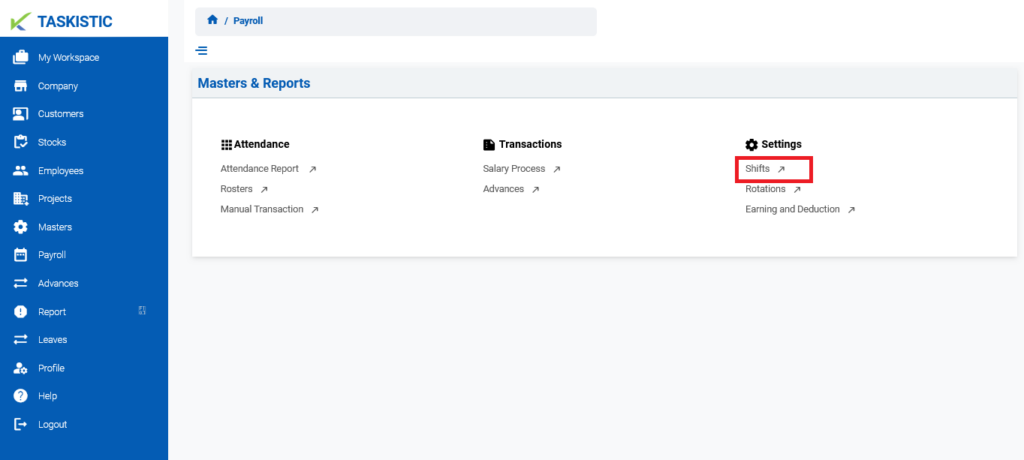
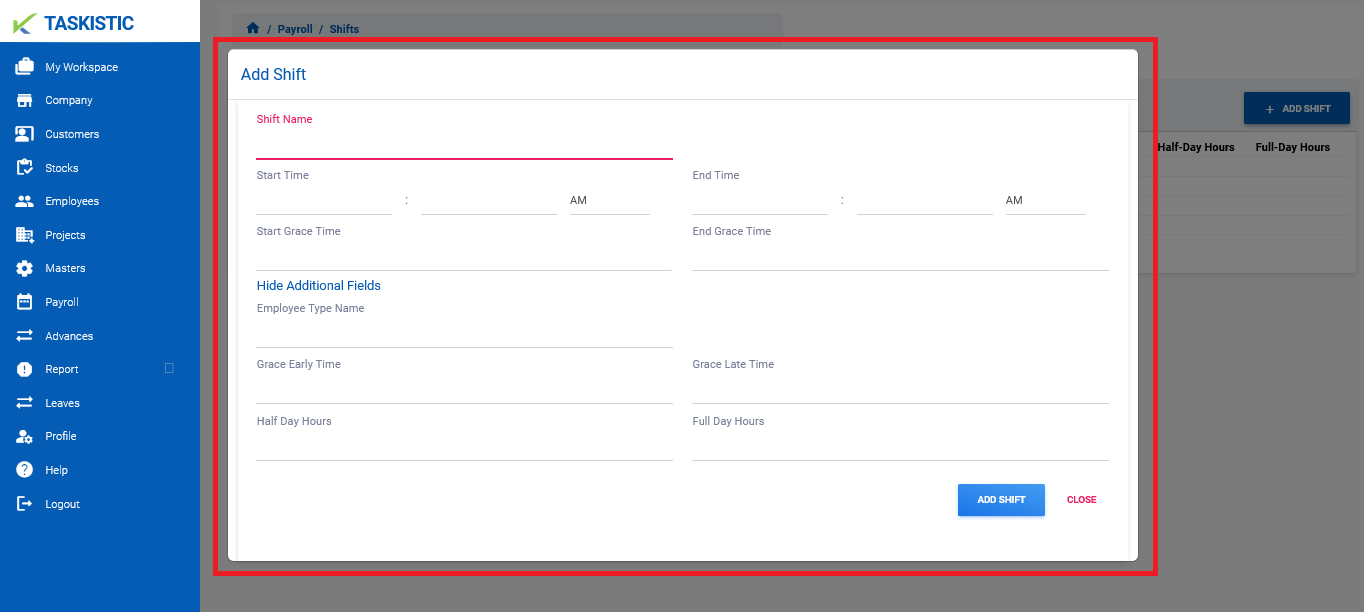
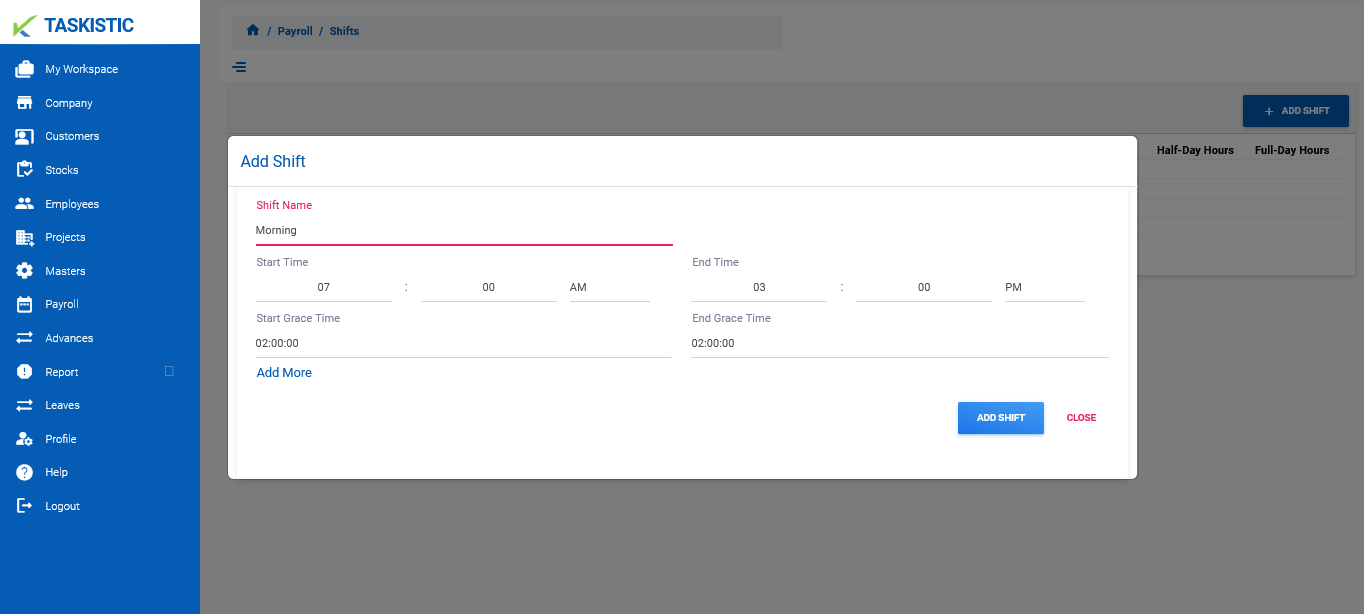
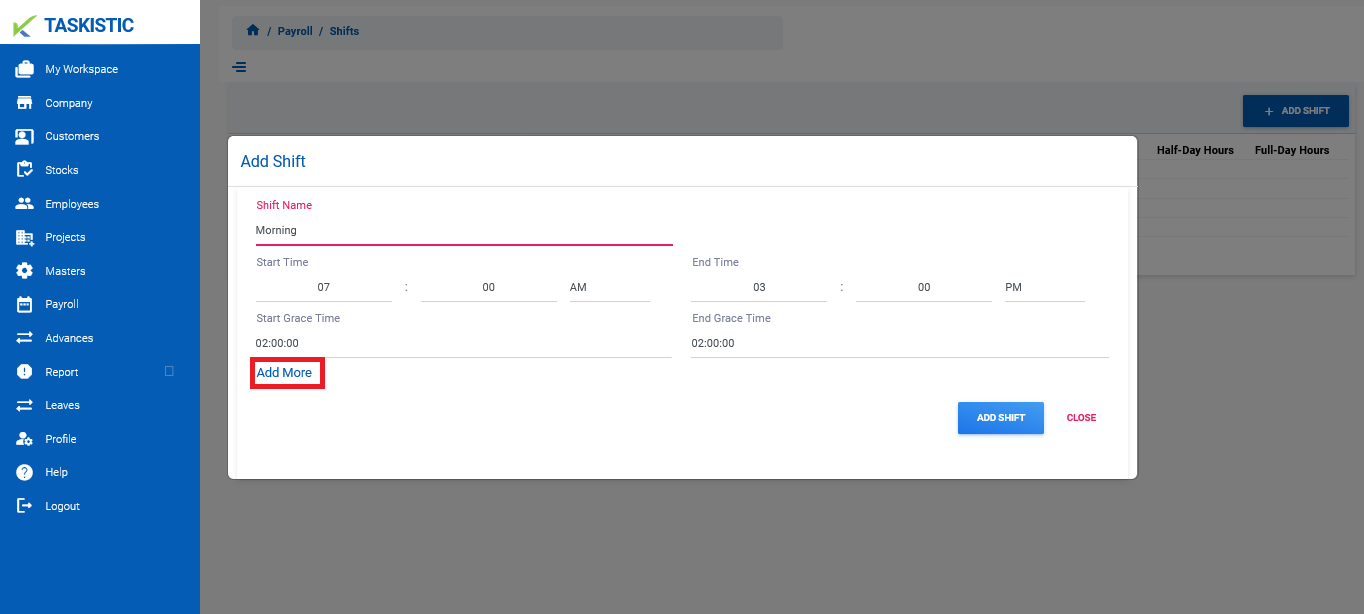
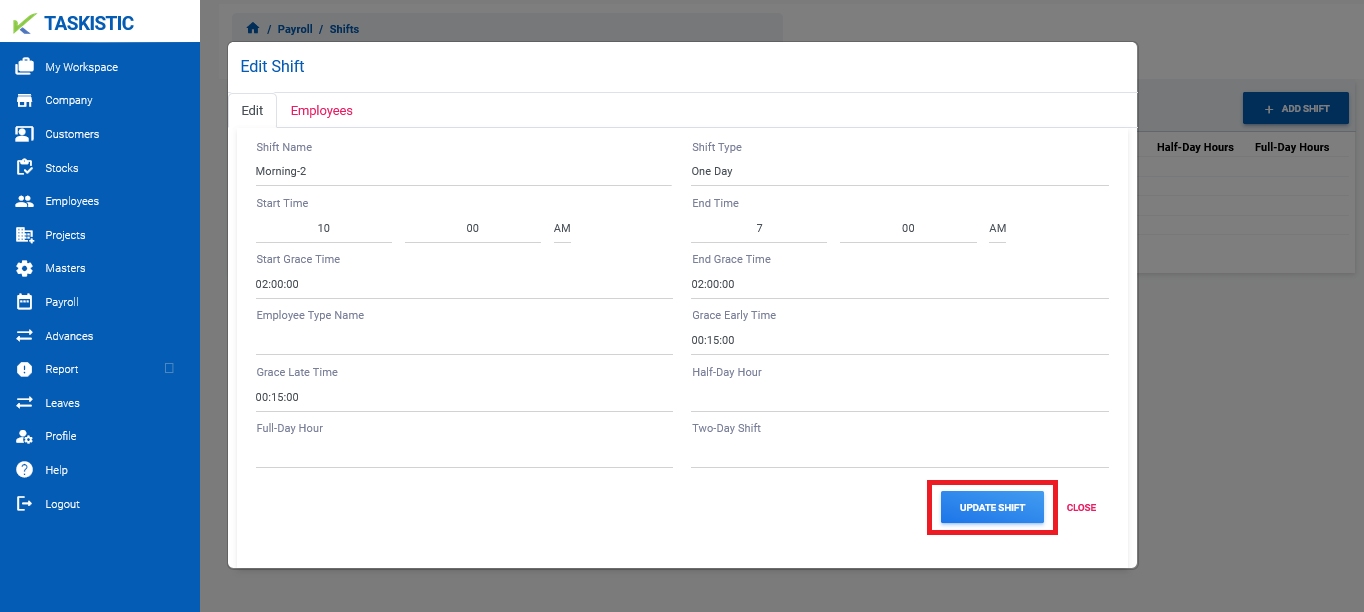
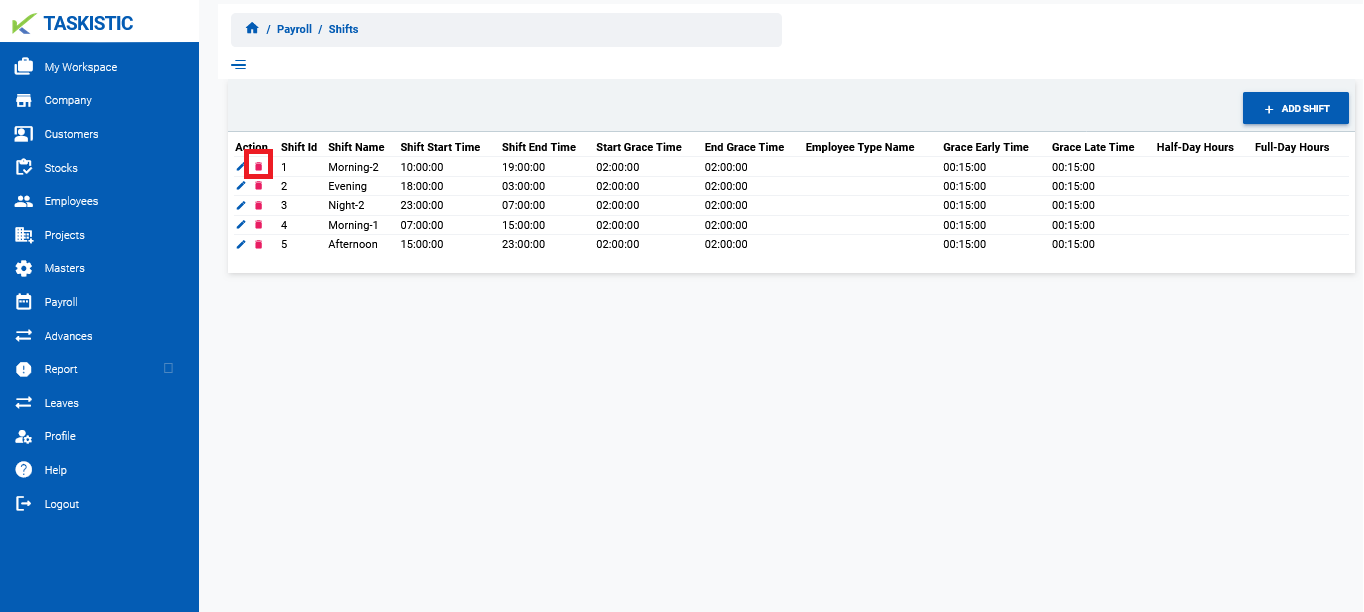
Table of Contents Step-By-Step Instructions Step 1: Access the Taskistic Platform Step 2: Navigate to the Projects Section Step 3: Access the Shifts Dashboard Step 4: Add a New Shift Step 5: Fill in Shift Details Step 6: Add More Details Step 7: Save the Shift Step 8: Edit a Shift Step 9: Delete a Shift Step-By-Step Instructions This document provides step-by-step instructions for creating a new project using the Taskistic platform. Step 1: Access the Taskistic Platform Open your web browser.Visit the Taskistic platform by navigating to https://yourdomain.taskistic.com Step 2: Navigate to the Projects Section Once you have logged in, look at the left sidebar of the Taskistic dashboard.Click on the “Payroll” tab to access the “Payroll” Management Section Step 3: Access the Shifts Dashboard In the “Payroll Dashboard,” click on “Shifts.”The “Shifts Dashboard” will appear. Step 4: Add a New Shift In the “Shifts Dashboard,” click on the “Add Shift” button. 2. A form popup window will appear. Step 5: Fill in Shift Details Enter the following details in the form:Shift NameStart TimeEnd TimeStart Grace TimeEnd Grace Time Step 6: Add More Details Click the “Add More” option to display additional fields. Fill in the following additional details:Employee Type NameGrace Early TimeGrace Late TimeHalf Day HoursFull Day Hours Step 7: Save the Shift After filling in all required fields, click the “Add Shift” button.The shift will be added successfully. Step 8: Edit a Shift To edit a shift, click the “Pen icon” tab next to the Shift ID. 2. Make the necessary changes in the edit form that appears. 3. After Changes Click the Update Shift Button. Step 9: Delete a Shift To delete a shift, click the “Red Bin Box Icon” tab next to the Shift ID.Confirm the deletion when prompted.